
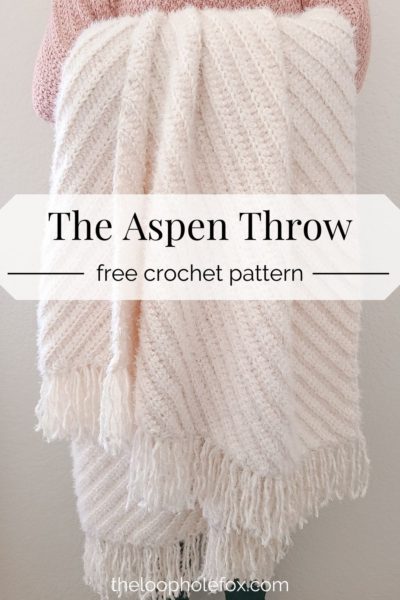
The Aspen Throw
When it’s chilly outside, there’s nothing better than being wrapped up in a thick blanket that has some weight to it so you can really feel the warmth. This easy half double crochet blanket is perfect to cuddle up in while watching your favorite show or reading a good book.
The Aspen Throw Blanket
Spoiler alert: I LOVE this crochet throw blanket. Half double crochets are easily my favorite of the basic stitches because of their smooth repetitive motion.
It’s no secret that big blankets can get a little boring, though, especially if they don’t have a ton of intricate details or stitch switching. I wanted to design a crochet throw blanket that was both easy and interesting into work and look at.
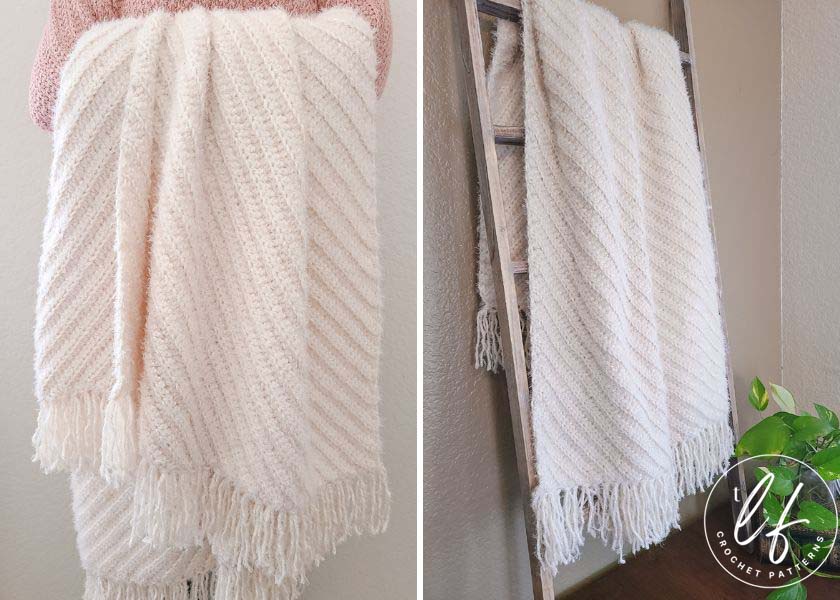
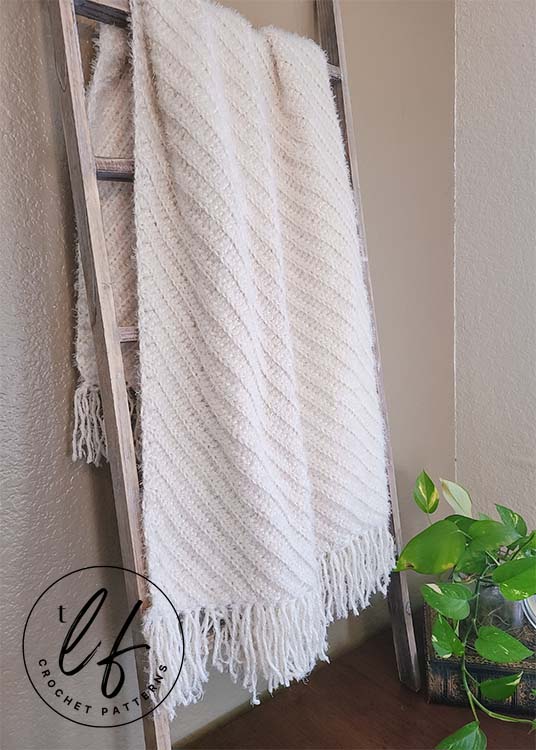
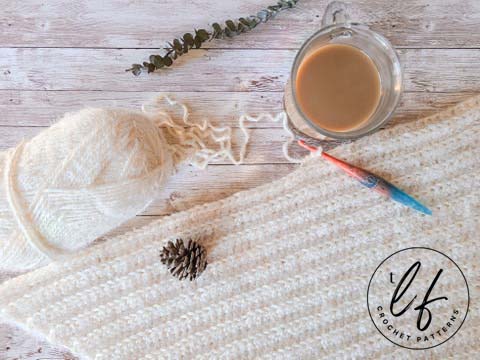
This crochet throw blanket boasts a modern, diagonal ribbing and beautiful fringe that looks great draped over a couch and is equally as cuddly to wrap up in.
This means that this easy half double crochet blanket is worked corner to corner, beginning with only 3 stitches and increasing up to size. Once at the desired size, we decrease until we reach only one stitch.
So, while this half double crochet blanket is technically an easy and quick make, it also keeps you on your toes a bit! You’ll find satisfaction in watching your triangle beginning grow, watching it slowly become a rectangle and finally, the most satisfying part, decreasing to the end.
The coziest yarn for this easy half double crochet blanket is…
Red Heart Hygge!
I normally don’t use yarn that is “fluffy”. I find yarns like this to usually split, catch and just be a pain to frog (if/when frogging is needed). I couldn’t help myself with Red Heart Hygge, though. I shopped for yarn for this easy half double crochet blanket for ages and finally noticed Red Heart Hygge sitting on the shelf. It was so soft and luxurious that I couldn’t just let it sit there on the shelf alone, you know? Haha.
I knew I wanted this crochet throw blanket to be as comfy, cozy and luxurious as possible using simple stitches. I took the plunge and moved forward with Hygge.
I was surprised to find that I had no issues at all working with this yarn. Trust me when I say I frogged this yarn quite a bit designing this crochet throw blanket pattern and I had basically no issues. I found it quite smooth and easy to work with and definitely felt nice in the hands during the work.
I found it to be perfect for this half double crochet blanket pattern but, of course, you can use any bulky weight yarn you prefer to! The blanket will still be as comfy and cozy and still be a fun and interesting crochet blanket pattern to follow.
The PDF version of this pattern includes the full written pattern, so you can cross off rows as you work!
If you’d like a copy of the PDF, you can grab one on either my Ravelry or my Etsy shop by clicking the buttons below.
DISCLAIMER: This post includes affiliate links. This means, should you decide to purchase a product via one of these links, I will receive a small commission at no extra cost to you. I only recommend products I use and love (Or products I know others love, have heavily researched, know have good ratings and plan to purchase myself). These small commissions help to support this blog and continue keeping most of my patterns free. You can read more on my Privacy Policy, if you prefer.
Where to Get this Half Double Crochet Blanket Pattern
The Aspen Throw Blanket is free in this blog post. Scroll down to view the free version!
However, if you’d like a more robust pattern with photo tutorials for the special stitches and step by step through Parts 1, 2 and 3, detailed graphics to help visualize the construction and a table for each part that includes the row to repeat and stitch count for each row, I recommend you purchase the PDF pattern. You can purchase the PDF pattern for this half double crochet blanket on my Etsy or Ravelry by clicking the corresponding button below.
SKILL LEVEL
Confident Advanced Beginner – This half double crochet blanket pattern heavily relies on the usage of half double crochets, of course! This means that you should be familiar and comfortable with half double crochets.
Crocheters looking to follow this pattern should also:
- Know how to read a crochet pattern. There is NO video tutorial for this pattern (though there is a step by step photo tutorial in the PDF pattern).
- Know how to work in the Back Loop Only or be willing to learn.
- Understand how to put multiple stitches into one stitch (increasing).
- Know how to work half double crochet decreases such as the hdc2tog and hdc3tog or be willing to learn.
The two decreases, hdc2tog and hdc3tog are explained in detail below.
YARN REQUIREMENTS
Bulky (5) weight yarn of your choice.
Yarn Used: Red Heart Hygge in Pearl – Approx 52 oz or 1,380 yards (6 and ½ skeins) including fringe.
Any bulky (5) weight yarn you prefer would do well with this blanket.
Fringe: The fringe on the blanket used approximately 2 oz of yarn, which I included in the yarn usage above.
TOOLS
6 mm hook
Scissors
Tapestry Needle
Stitch Markers, if you prefer them.
GAUGE
12 hdc stitches in back loop only x 9 rows = Approximately 4 inches x 4 inches
FINISHED SIZE
Approximately 50 inches long x 42 inches wide (without fringe)
ABBREVIATIONS
In US terms;
- Ch – Chain
- Hdc – Half double crochet
- Hdcblo – Half double crochet in back loop only
- Blo – Back loop only
- St(s) – Stitch(es)
- Hdc2tog – Half double crochet 2 together (decrease 2 stitches to 1 stitch)
- Hdc3tog – Half double crochet 3 together (decrease 3 stitches to 1 stitch)
- (…) – Stitch counts are listed at the end of the row in bold italics.
- “2 hdcblo” or “3 hdcblo” means to place 2 or 3 half double crochet stitches in the back loop only of the same stitch.
Half Double Crochet 2 Together
The Half Double Crochet 2 Together (or hdc2tog) is a half double crochet decrease that decreases 2 stitches into 1 stitch.
To hdc2tog, you will: yarn over, insert your hook into the first indicated stitch (Picture 1, below, right most black arrow), yarn over and pull up a loop. 3 loops on hook (Picture 2). Yarn over again, insert hook into the next stitch (Picture 2, black arrow), yarn over, pull up a loop. 5 loops on hook. Yarn over and pull through all loops on hook (Picture 3, white arrow). Your hdc2tog is complete (Picture 4). You would then place 1 stitch into the next stitch (Black arrow, Picture 4).
In this pattern, you will always work this decrease into the Back Loops Only (blo) of the stitches.
Half Double Crochet 3 Together
The Half Double Crochet 3 Together (or hdc3tog) is a half double crochet decrease that decreases 3 stitches into 1 stitch.
The hdc3tog is similar to the hdc2tog. We use one more stitch in the hdc3tog than we do in the hdc2tog.
To hdc3tog, you will: yarn over, insert your hook into the first indicated stitch (Picture 1, below, right most black arrow), yarn over and pull up a loop. 3 loops on hook. Yarn over again, insert hook into the next stitch, yarn over, pull up a loop. 5 loops on hook (Pictures 1, 2 and 3 from the hdc2tog pictures). Yarn over again, insert hook into the next stitch (Picture 2, below), yarn over, pull up a loop. 7 loops on hook. Yarn over and pull through all loops on hook (Picture 3, white arrow). Your hdc3tog is complete (Picture 4). You would then place 1 stitch into the next stitch (Black arrow, Picture 4).
In this pattern, you will always work this decrease into the Back Loops Only (blo) of the stitches.
Back Loop Only
Working into the back loop only (or blo) is what creates the beautiful ribbing on this blanket.
Half double crochets have 3 loops. The Front Loop, the Back Loop, and a 3rd Loop. We will only use the back loop.
When we look at a half double crochet “straight on” when it’s laying flat on a surface, we can see 2 loops. We see the Front Loop at the top and sitting under the front loop, we see the 3rd loop (Picture 1, below. Front loop is highlighted pink and the 3rd Loop is highlighted orange).
We will not use either of these loops. We will instead use the Back Loop Only which is behind the Front Loop.
When we look at the work at an angle or “top down”, we will see all 3 loops. (Picture 2, below. Front and 3rd loops are highlighted as before. The back loop is highlighted yellow). We will insert our hook ONLY into this loop (Picture 3). Once we have placed our hdc in the back loop only, we will notice the Front and 3rd loop remain unworked (Picture 4, below – Front and 3rd Loop are highlighted pink and orange. The back loop is highlighted yellow with a “break” to how that the hdc went only into this loop).
You will see “hdcblo” in this pattern. This means to place 1 half double crochet in the Back Loop Only of the indicated stitches.
You will also see “hdc2tog in blo” or “hdc3tog in blo”. This means to create a half double crochet 2 or 3 together using the Back Loop Only of the indicated stitches.
NOTES
- Chain 2 at beginning of rows does not count as a stitch. Always start your row in the first stitch. They do not count as a stitch at the end of a row, either. Do not place any stitches into the chain 2’s.
- You may want to mark your first and last stitch of the row with a stitch marker.
- Every row is worked entirely in the Back Loop Only.
- This blanket is worked “corner to corner”, which creates the diagonal ribbing. This means we begin the work in a corner and increase or decrease to create the rectangle shape of the blanket, instead of working on one long chain.
- This pattern is broken down into Parts 1, 2 and 3. Part 1 creates the width of the blanket, Part 2 creates the height of the blanket and Part 3 finishes the blanket.
- If you prefer a square blanket and not a rectangle, you can skip Part 2.
- The rows switch how many stitches they are increased or decreased by. This is necessary to ensure the blanket has 90 degree right angles.
- You can change the size of the blanket very easily. Please see “Changing Size”.
- There are graphics in this pattern to help visualize the construction process.
- Stitch counts are referenced at the end of each row in parentheses and bold italics (#).
CHANGING SIZE
To change the width, repeat the rows listed in Part 1 until the blanket is your desired width.
To change the height, repeat the rows listed in Part 2 until the blanket is your desired height.
Then, work Part 3 as instructed. Part 3 will have the same number of rows as Part 1, so keep track of how many rows you worked in Part 1.
Make sure that you stop repeating rows on the same row repeat as the pattern instructs so that the pattern and its required math work out properly. Keep in mind your stitch count WILL be different from the pattern if you change the amount of times you repeat the row. Keep track of your stitch count. And, of course, your yarn usage will be different from the usage listed in this pattern.
BLANKET CONSTRUCTION
This blanket is worked in 3 parts. We start in the lower left hand corner and end in the upper right hand corner.
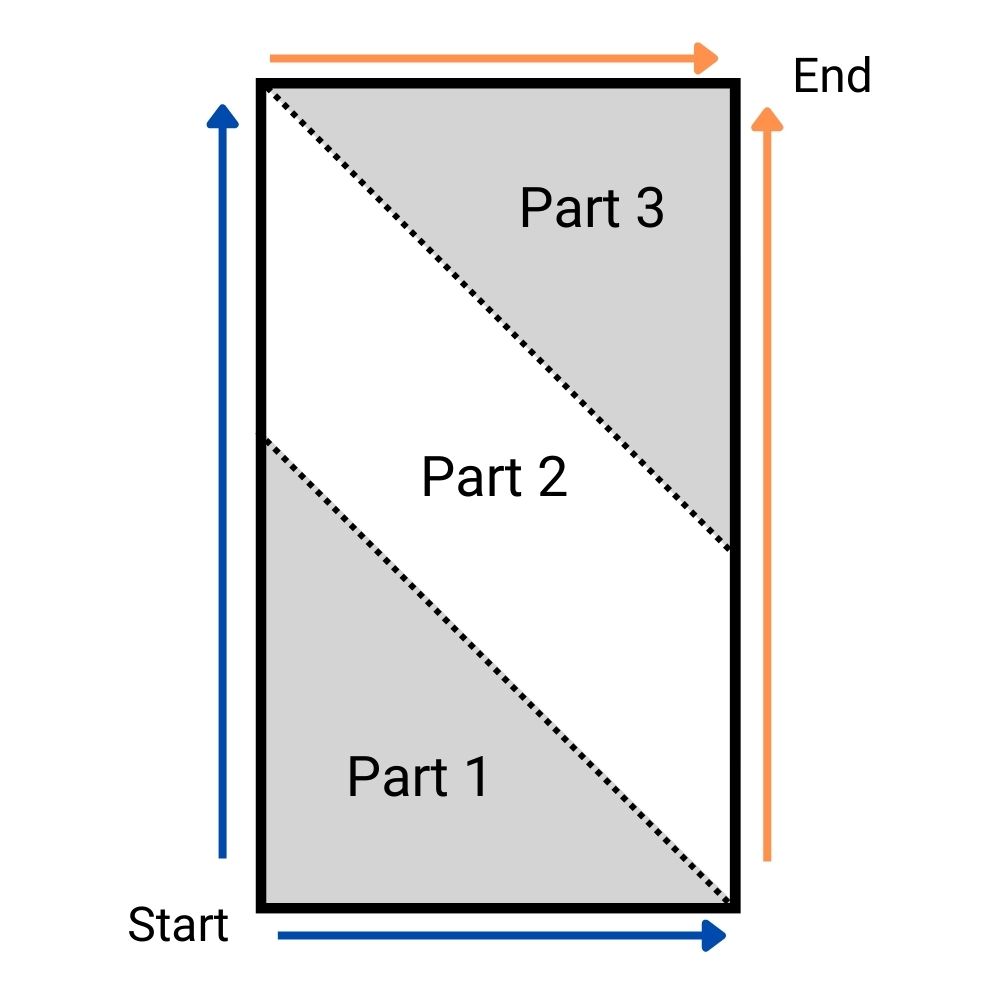
Part 1 creates the first right angled triangle of the blanket, which is in the bottom left of the rectangle above. Part 2 creates the height of the blanket and Part 3 finishes the blanket.
Blue arrows indicate the sides of the blanket that will be INCREASED (placing 2 or 3 stitches into 1 stitch). Orange arrows indicate the sides of the blanket that will be DECREASED (hdc2tog or hdc3tog).
Note that Part 1 only has increases and Part 3 only has decreases. Part 2 has increasing on one side and decreasing on the other.
Half Double Crochet Blanket Pattern
Part 1 – Creating the Blanket Width
Part 1 creates a right triangle by beginning in a “corner” and increasing both the first and last stitch of each row.
Create a Magic Circle (or chain 3, slip stitch to first chain made to create a circle).
Row 1 – In Magic Circle, ch 2 (does not count as a stitch here or throughout). Place 3 hdc in circle. Pull tail tight. (3)
Row 2 – Ch 2, turn. Place 2 hdcblo in 1st stitch, 1 hdcblo in next st, and 2 hdcblo in last st. (5)
Row 3 – Ch 2, turn. Place 3 hdcblo in 1st stitch, 1 hdcblo each of the next 3 sts, and 3 hdcblo in last st. (9)Row 4 – Ch 2, turn. Place 2 hdcblo in 1st st, 1 hdcblo in each st until 1 st remains, 2 hdcblo in last st. (11)
Row 5 – Ch 2, turn. Place 3 hdcblo in 1st st, 1 hdcblo in each st until 1 st remains, 3 hdcblo in last st. (15)
For Rows 6 through 56, repeat Rows 4 and 5 in order. This means Row 6 will be a repeat of Row 4 and Row 7 will be a repeat of Row 5. Row 56 will be a repeat of Row 4. You will have 167 stitches at the end of Row 56.
Tips for Part 1:
You may notice that the ends of the rows want to curl. This isn’t because you’ve done anything wrong. These are the increases and it’s not a problem. Push these around as needed so you can see the stitches properly.
Keeping your stitch count correct is very important and you will need to make sure that you are increasing correctly. The rows switch from having 2 stitches in the first and last stitch to having 3 stitches in the first and last stitch. This is important for Part 1. This ensures that the sides stay straight and as a right triangle instead of bowing in or out.
You may find it helpful to mark every other row with a stitch marker to keep track. For example, you could mark the side of Row 3 and each repeat of Row 3 to keep track.
Part 2 – Creating the Blanket Height
Part 2 creates the height of the blanket. The stitch count does NOT increase but we do work increases on one side because we worked decreases on the other side. This ensures the work continues to go straight up.
*If you prefer a square blanket instead of a rectangle, skip Part 2 (Rows 57 through 67) and go directly to Part 3.
Row 57 – Ch 2, turn. Hdc3tog in blo first 3 sts, 1 hdcblo in each st until 1 st remains, 3 hdcblo in last st. (167)
Row 58 – Ch 2, turn. 2 hdcblo in first st, 1 hdcblo in each st until 2 sts remain, hdc2tog in blo the 2 remaining sts. (167)
For Rows 59 through 67, repeat rows 57 and 58 in order. This means Row 59 will be a repeat of Row 57 and Row 60 will be a repeat of Row 58. Row 67 will be a repeat of Row 57. You should have 167 stitches at the end of Row 67.
Part 3 – Finishing the Blanket
Part 3 finishes filling out the blanket. With Parts 1 and 2 completed, you should now have a shape that looks like a rectangle with one corner cut off.
Row 68 – Ch 2, turn. Hdc2tog in blo first 2 sts, 1 hdcblo in each st until 2 sts remain, hdc2tog in blo the 2 remaining sts. (165)
Row 69 – Ch 2, turn. Hdc3tog in blo first 3 sts, 1 hdcblo in each st until 3 sts remain, hdc3tog in blo the 3 remaining sts. (161)
For Rows 70 through 122, repeat Rows 68 and 69 in order. This means Row 70 will be a repeat of Row 68 and Row 71 will be a repeat of Row 69. Row 122 will be a repeat of Row 68. Your stitch count for Row 122 will be 3.
Row 123 – Ch 2, turn. In blo, hdc3tog the 3 stitches of the row. (1)
Cut yarn and weave all ends. The main blanket is complete!
I opted not to put a border on this half double crochet blanket because I like the look of the raw edge as it looks more organic and natural. For this reason, I have not written into the pattern how to put a border on. If you prefer to put a border on, do that now.
FRINGE
Adding Fringe
If you’d like to add fringe, decide how long you want your fringe and how many strands of yarn will go in each stitch.
My fringe is 4 inches long and I placed 2 strands of yarn per stitch.
Cut several strands of yarn 2x the length you’d like for your fringe. Fold the yarn in half so you have a loop, use your hook to pull the loop through the side of the stitch on the row and pull the tails through this loop.
Pull the tails to tighten. Repeat as many times as necessary along the short ends of your blanket. Once your fringe is on, you’re all done!
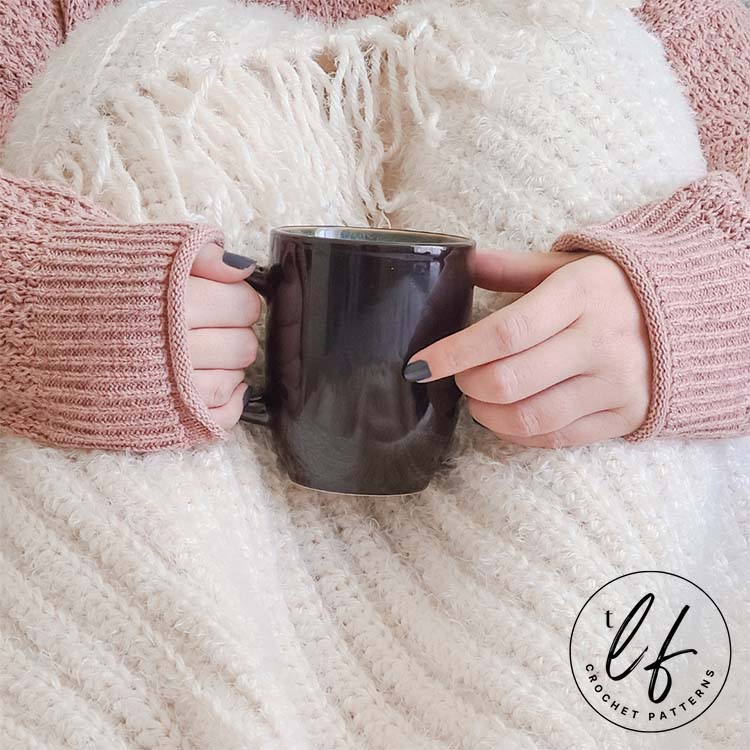
Once your fringe is complete, you’re all set to huddle under your new half double crochet blanket, relax and binge watch some Netflix. You deserve it!

I hope you love the Aspen Blanket as much as I do. I love how this easy half double crochet blanket works up and it’s added personality with the diagonal ribbing and fringe. I hope you stay warm and cozy this winter.
One of my greatest joys is seeing your finished crochet projects from my patterns or tutorials, so when you post to Instagram, don’t forget to tag me so I can show you some love! I’m @theloopholefoxcrochet and you can tag me using #theloopholefoxcrochet. You can also share pictures on my recent posts on Facebook or within my Facebook group!
And don’t forget to pin this to your Pinterest boards, so you can remember it for later!
Don’t forget to join my Facebook Group so we can chat all about your creations! We are a group for crocheters of all experiences, all interests and love to hang out together. Come join the fun!

Shannon | Designer & Editor
Shannon helps crocheters find their next project and build their skills with in depth tutorials and crochet patterns on her blog, theloopholefox.com.
With more than a decade of crochet experience, Shannon knows that understanding why we do something matters just as much as how we do it. She teaches new techniques and crochet stitches in depth so you can crochet with confidence.
Looking for more Crochet Blanket Patterns? Try These!
Want a gorgeous blanket full of different types of stitches to keep you engaged and learning? Check out the Harmony Blanket CAL! (Begins October 17, 2022)
If you love baby blankets, you’ll love these Crochet Baby Blanket Patterns!
If you want some quick projects you can work on while waiting, you can try out some of my Crochet Blanket Squares!
Thank you for the beautiful blanket pattern. I can’t wait to lay under it!!
You are very welcome! I hope you love it. I can’t get out from under mine! (I’m not complaining, though.)
Thanks Shannon. I will post of pic of it when I am finished!
You’re welcome! I can’t wait to see it. Thank you again! 🙂